Writes about Microsoft 365, Intune, Purview, SharePoint, Teams, Defender and more

Category: Intune

Let me tell you something about FIDO2 key authentication Part 2

Welcome back to part two of our FIDO2 blog series! In part one, we explored how to enable FIDO2 key authentication in Microsoft Entra and how to register the key for a user. In this post, we’re diving into the next piece of the puzzle—configuring Windows Hello for Business (WHfB) in Intune to allow FIDO2 key sign-in.

This step is crucial if you want a consistent passwordless experience across your Windows devices, including desktops, laptops, and even mobile (yes, we’ll get to on part 3 of this series!).

Table of Contents:

  1. Introduction
  2. Prerequisites
  3. Enable Windows Hello for Business in Intune
  4. Enable Windows Passwordless Experience with an Intune device policy
  5. Testing the new sign in experience on a windows device
  6. Resetting the Fido Key
  7. Conclusion

1. Introduction

If you’re planning to roll out FIDO2 keys as a sign-in method, configuring Windows Hello for Business in Intune is essential (especially since this method is more tailored to corporate environments and not something an average user would typically set up in his environment).

Without this method , users can authenticate in browsers or mobile apps but not directly from the Windows lock screen.

Let’s fix that!

2. Prerequisites

Before we start, make sure you meet the following requirements:

Users need an Intune device configuration policy that enables Windows Hello for Business
Devices must run Windows 10 version 1903 or later, or Windows 11
Devices should be Azure AD joined (or Hybrid Azure AD joined)

3. Enable Windows Hello for Business in Intune

We want to enable FIDO2 key authentication across all Microsoft systems and for various scenarios. This will allow users to authenticate with the key on a webpage, mobile device, and of course, their personal computer.

Follow the steps below to enable this method within Windows Hello for Business:

  1. Open the Intune Admin Center and go to Devices.
  2. Select Enrollment from the menu.
  3. Choose Windows Hello for Business.
  4. Enable Windows Hello for Business by toggling it on (if it’s not enabled already).
  5. Scroll to the bottom and ensure Use security keys for sign-in is enabled.
  6. Click Save to apply the changes.

If it’s already enabled by your organization, you can skip this step.

4. Enable Windows Passwordless Experience with an Intune device policy

To ensure a full passwordless experience—including Windows Hello for Business sign-in at the lock screen—we also need to configure a policy in Intune.

This setting is needed to make passwordless sign-in work on the Windows lock screen using Windows Hello for Business. Without it, users can still sign in with a FIDO2 key in the browser or on mobile apps, but not directly on the device.

Below are some specific considerations for this part.

And this is how to create the policy in Intune:

Open a browser and go to the Microsoft Intune admin center and follow below steps:

  1. In the left-hand menu, go to Devices.
  2. Click on Configuration and then select
  3. Create to start a new policy.
  4. For Platform, select Windows 10 and later.
  5. For Profile type, choose Settings catalog.
  6. Click Create to continue.

Give the policy a name and continue

In the next page follow below steps:

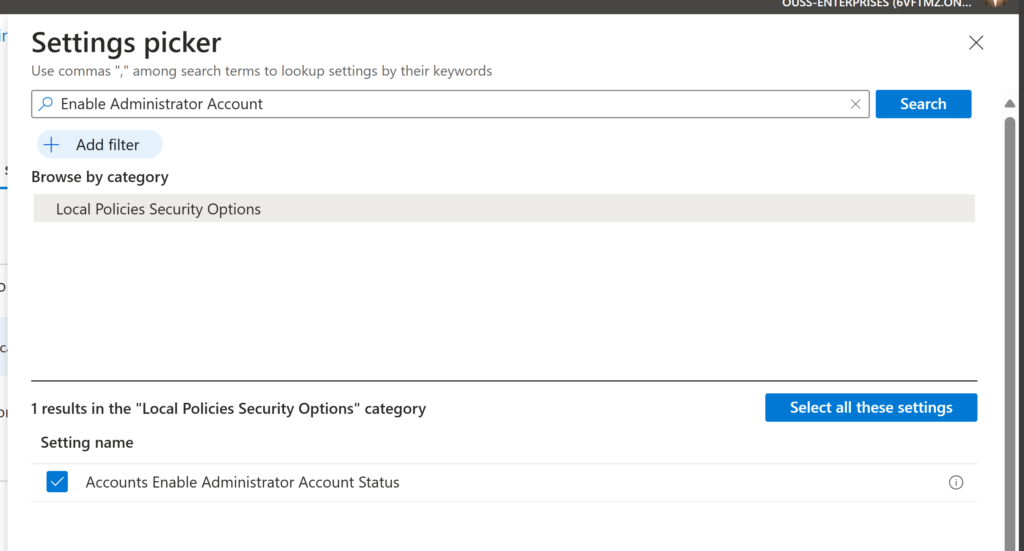
  1. Click on + Add settings
  2. In the Settings picker, type “Use security key for sign-in”
  3. Select Windows Hello for Business
  4. Under Settings name, select Use security key for sign-in
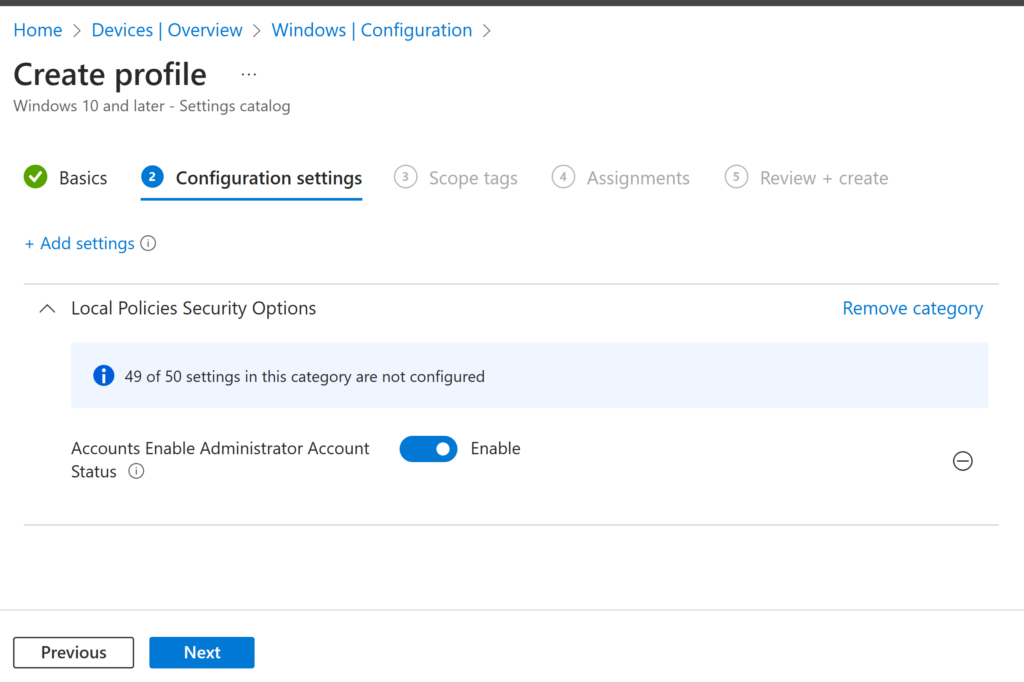
  5. Set the option to Enabled

If you make use of scope tags or want to target a specific assignment group (for testing, for example), go ahead and select those. But in our case, we want all Autopilot devices to have this option enabled by default:

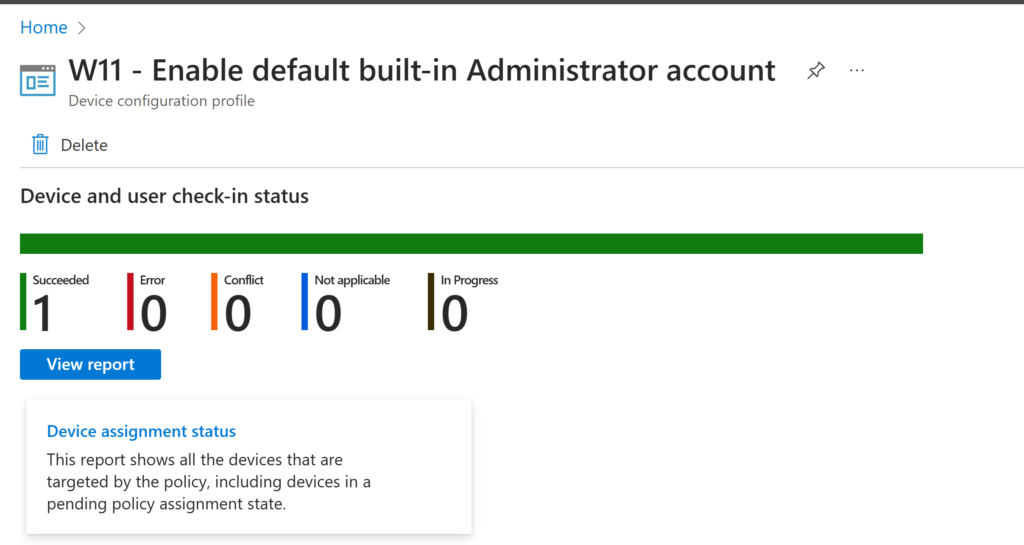
If everything looks good, press Next and then Create to enable and deploy the policy.

Once this policy is applied, users will be able to use FIDO2 keys right from the Windows sign-in screen—no password needed. So let’s go ahead and test it out.

5. Testing the new sign in experience on a windows device

In the previous blog, we walked through how to configure and register a FIDO2 key as an authentication method for your user account. If you haven’t done that yet, I recommend checking it out first.

Now that your our FIDO2 key is already set up, let’s test it out for a passwordless Windows sign-in:

Steps to Sign in with Your FIDO2 Key

  1. On the Windows lock screen, click Other user and click on Sign in options

2. You’ll now see a new option: Sign in with a security key. Insert your FIDO2 key into the USB port and click the option. (Since the key has already been configured, you’ll be prompted to enter your PIN code).

Enter the PIN code you created during setup and press Enter.

3. You will get asked to touch the key when the key’s green Y light flashes, touch the key to continue.

If everything went well you will see the famous Windows Hello logo:

🎉 Congratulations, you’ve just completed your first passwordless login on Windows using a FIDO2 key!

6. Resetting the Fido Key

If you want to change the PIN code or reset the Fido key entirely, download the YubiKey Manager. After the usual next, next, next, the program will launch. Click on Applications, select FIDO2, and choose either Change PIN or Reset FIDO2.

You’ll be prompted to touch the key to verify that it’s in your possession.


7. Conclusion

And that’s it! You’ve now successfully configured Windows Hello for Business to support FIDO2 keys and tested the full sign-in experience—from inserting the key to logging in without typing a password. This is a big step toward a truly passwordless future in your organization and for users to not have to change the password so many times as that’s really something of the past imo.

In the next part of this series, we’ll show you how to use the FIDO2 key for secure Privileged Identity Management (PIM) role activation. That one’s especially important for admins and high-privilege users, so make sure to stick around!

Until next time—stay secure and password-free! 🔐

Let me tell you something about Windows Laps and Intune

To my surprise, I haven’t written about Intune yet.
Given that my header promises content about Intune, it’s about time we dive into this topic!

Today’s blog will be about enhancing security and streamlining the management of local administrator passwords across your Windows devices by implementing LAPS with Intune.

In this article, we’ll walk you through the step-by-step process of setting up LAPS with Intune and explore the numerous benefits it can bring to your organization. Whether you’re looking to improve your security or simplify password management, this guide will provide you with everything you need to get started.

Table of Contents:

Prerequisites
Understanding LAPS and its Integration with Intune
Step-by-Step Guide
Step 1: Enable LAPS in Microsoft Entra
Step 2: Enable the local admin account
Step 3: Create the LAPS policy in Intune
Step 4: Test the solution
Troubleshooting
Final Thoughts

Prerequisites

Setting up Local Administrator Password Solution (LAPS) for your Intune tenant for the first time is straightforward, but it does come with specific requirements (I know because I didn’t meet them in my first test 😅).

To ensure Intune supports Windows LAPS in your environment, you’ll need to meet the following prerequisites:

Windows OS requirements:

License requirements:

Microsoft plan with at least:

  • Microsoft Entra ID
  • Intune Plan 1
Most companies have above licenses and the required Windows OS so it shouldn't be a problem for them to use LAPS.

Understanding LAPS and its Integration with Intune

Local Administrator Password Solution (LAPS) is a Microsoft tool designed to improve the security of local admin passwords on Windows devices. By generating unique passwords for each device and securely storing them on-premises (Active Directory) or in the Cloud (in Entra ID), LAPS addresses the security risks of shared, old and unsecure passwords (or passwords that never get changed even if staff changes happen the password are the same for many years!).

When combined with Microsoft Intune, LAPS provides a centralized way to manage these passwords, enhancing security and simplifying administrative tasks. Here are the key advantages of using LAPS with Intune:

  1. Centralized Oversight: Intune streamlines the management of admin passwords across all Windows devices from a single platform.
  2. Enhanced Security: Unique and complex passwords for each device reduce the chances of unauthorized access.
  3. Built-In Functionality: The latest Windows OS versions come with the LAPS agent, removing the need for additional installations.
  4. Operational Efficiency: Automating password updates frees up time and resources that would be spent on manual changes.
  5. Compliance and Monitoring: LAPS offers a detailed audit log of password changes, ensuring adherence to security policies and facilitating easy monitoring through Intune.

Using LAPS with Intune not only boosts your security framework but also simplifies the management of local admin passwords, making your IT processes more efficient and secure.

Step by step guide

In this section, we will walk you through the process of setting up LAPS with Intune. Follow these steps to ensure a smooth and successful implementation of Local Administrator Password Solution in your environment. Let’s get started!

Step 1: Enable LAPS in Microsoft Entra

The initial step is to activate the LAPS solution through the Microsoft Entra ID portal. Follow these steps to verify if LAPS is already enabled or to enable it:

After activating the LAPS solution, it’s important to enable the default built-in local admin account. Windows disables this account by default for security reasons, but we will use this account for the LAPS solution (You can use another account if you prefer).

Step 2: Enable the local admin account

We need to create a new device profile.
First Navigate to the Intune portal and go to Devices -> Configurations.
Press Create and select New policy. Select Windows 10 and later as the platform and pick the Settings catalog as the profile type.

Name your policy and press Next.

In the configuration settings page, click Add settings and select the policy.

Enable the policy and press next

Configure scope tags or special assignments if needed.
We opted to enable the policy on all devices, ensuring that the policy applies universally (We don’t recommend using user assignment!).

Review the policy and click Create.

Now that we have enabled the local admin account we need to create the LAPS policy.

Step 3: Create the LAPS policy in Intune

In this step, we will create the LAPS policy in Intune and push it to all devices.

From the Intune Portal, go to Endpoint security -> Account protection. Click Create Policy and select Windows 10 or later and Local admin password solution (LAPS).

Give your profile a name and click Next. Configure the settings you want to apply.. Below are the settings we configured:

If needed, configure scope tags or special assignments. We want to enable this policy on all devices so select All Devices (If you want to exclude devices you can configure that on this step as well).

Review the settings and click Create.

After a few hours, the devices will pick up this setting.
To speed up the process, you can manually sync the device:

or bulk sync multiple devices.

Step 4: Test the solution

After waiting for a little bit you could check if the policy have been applied to your device by checking the overview page of the created LAPS policies:

As you can see the policies have been applied successfully. We will now test the laps solution to see if it works.

Go to the Intune portal and select the device you want to test with. Click Local admin password -> Show local admin password and Copy or view the password from there.

Use the LAPS-generated password to start a process that requires administrator credentials.

If you can open the elevated command prompt succesfully, the LAPS solution has been implemented correctly!

If the solution doesn’t seem to apply or work, check the following part.

Troubleshooting

If you’re experiencing delays in the policy applying, you might want to check the following on the device:

Registry

Verify that there is a new registry entry for LAPS with the applied settings. If the entry is missing, LAPS might not be functioning correctly, and you may need to update the OS. (This was the case for me with an outdated VM🙄). The oath should be:

HKEY_LOCAL_MACHINE\SOFTWARE\Microsoft\Policies\LAPS

Event viewer

You can also check the Event Viewer for any issues. Look for a new LAPS folder created under the following path:

Application and Services Logs -> Microsoft-Windows-LAPS/Operational

Final Thoughts

Implementing LAPS with Intune boosts your security by automating local admin password management and fixing issues like outdated or unsafe practices.
This makes your admin tasks easier and keeps your IT environment compliant and efficient.

I hope you enjoyed this in-depth and technical blog post. I aim to balance content for various audiences, so you’ll see a mix of detailed guides and practical tips. Your feedback helps me fine-tune this balance, so feel free to share your thoughts!

Untill next time 💪