Welcome back to the final part of our FIDO2 blog series!
In Part 1, we walked through enabling FIDO2 key sign-in in Microsoft Entra and registering the key for a user. In Part 2, we looked at how to use the key for Windows Hello for Business using Intune. In this final post we’ll explore how to use the FIDO2 key to activate privileged roles, like Security Administrator, using Microsoft Entra’s Privileged Identity Management (PIM) and a bonus section!
This is where things really come together. Not only is your sign-in passwordless, but now your privileged role activation is phishing resistant and far more secure (and for IT Admins this might be the best part in the series 🫡).
Table of Contents
- Introduction
- Why FIDO2 as an MFA method?
- FIDO2 as an authentication method for PIM roles
- FIDO2 as authentication strength in Conditional Acces
- Configure the PIM role with the Authentication Context
- How the PIM role works in practice
- Bonus section part 1: Set up Temporary Access Pass (TAP) for onboarding
- Bonus section part 2: Testing the new sign in experience on a mobile device
- Final thoughts
1. Introduction
These days, traditional MFA isn’t always enough—especially for high-privilege roles or emergency break glass accounts
Starting on October 15, 2024, to further increase your security, Microsoft will require admins to use multifactor authentication (MFA) when signing into the Microsoft Azure portal, Microsoft Entra admin center, and Microsoft Intune admin center
For those scenarios, using a FIDO2 hardware key adds an extra layer of security that’s phishing-resistant, tied to something physical and can be used by multiple people that have access to the key. Think of a key stored in a safe, only used when absolutely necessary, or required for sensitive role activation. In this blog, we’ll walk through how these keys can help make identity protection even stronger where it really counts.
2. Why FIDO2 as an MFA method?
FIDO2 keys are:
✅ Phishing-resistant
✅ User-friendly
✅ Supported across multiple platforms (also on mobile devices, see bonus section!)
✅ Capable of passwordless sign-in and acting as an MFA method
This is particularly useful when you need to satisfy MFA requirements without relying on personal phones or Authenticator apps. It’s a great alternative for IT admins, users in secure environments and external users who need temporary access to your environment and especially when you want to avoid the hassle of installing and configuring Microsoft Authenticator on their phone.
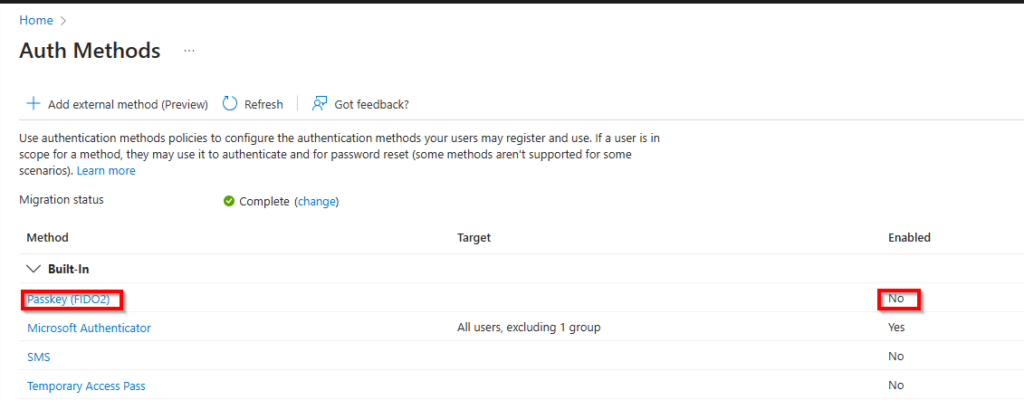
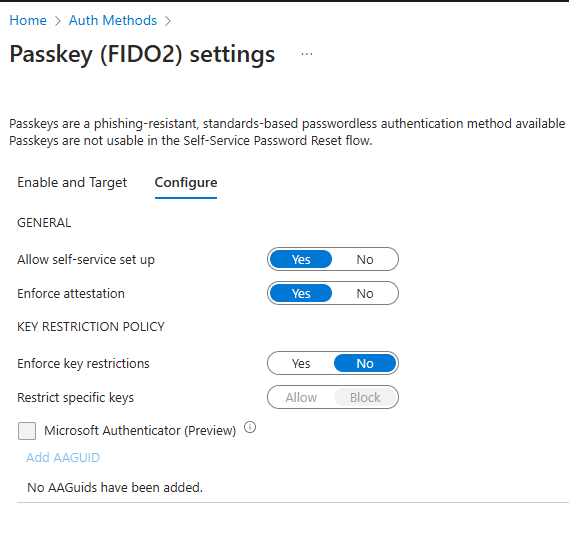
3. FIDO2 as an authentication method for PIM roles
To allow users to register and use FIDO2 keys see my previous blog.
If you want to go completly passwordless and only use/allow FIDO2 key as an authentication method for users or admins we need to enable the Temporary Access Pass (TAP) first (see bonus section).
4. FIDO2 as authentication strength in Conditional Access
Now let’s start with configuring the FIDO2 key when activation PIM roles.
To ensure that PIM role activation requires the use of a FIDO2 key, we need to create an Authentication Strength policy.
Here’s how:
- Go to Microsoft Entra → Protection → Conditional Access → Authentication strengths
- Click + New authentication strength
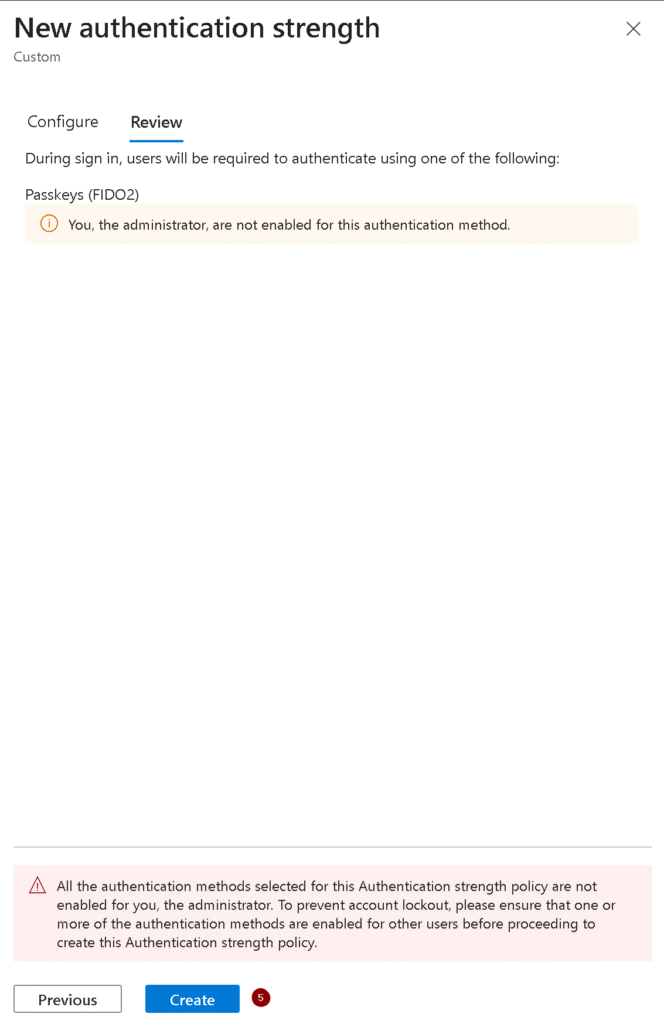
- Name it something like:
FIDO2 Only - High Privilege - Under Methods, select only FIDO2 Security Key (you could click on advance options and limit the GUID’s by only adding your Fido2key, but we will skip this step for now).

5. Read the warning and click Create
Steps to Configure FIDO Key Requirement for PIM Role Activation (Security admin for example).
1. Create a Conditional Access Policy for FIDO Key Enforcement
To enforce the use of FIDO keys during role activation, configure a Conditional Access Policy as follows:
- In the Entra Admin Center, go to Protection> Conditional Access.
- Click + New policy and name it (e.g., “Enforce FIDO2Key for Admin Activation or something that’s clear for you”).

3. Create a new Authentication Context to use for the Conditional Access Policy.
Give the authentication context a name that uses some consistency so you know what the relation between the authentication context and strenght is later on, publish it to apps and click Save.

4. Create the Conditional Access policy
- Give the policy a name (mine is CA017 – Enforce FIDO2Key for Admin Activation)
- Assignments:
- Users or workload identities: Select the Security Administrator or other roles.
- Target resources: Choose All resources.
- Conditions (optional):
- Add conditions such as specific (corporate) locations or compliant devices if required.
- Access Controls:
- Select Grant, then enable Require authentication strength.
- Choose the FIDO2-Key-High Privilege-Roles
authentication method that we created earlier.
- Turn the policy on and click on Create.

5. Configure the PIM role with the Authentication Context
- Navigate to Identity Governance > Privileged Identity Management.
- Under Manage, select Microsoft Entra roles and click Roles,
- Search and select Security Administrator.

4. Configure PIM Settings for Role Activation
Select the Security Administrator role, then go to Settings and select Edit.

Now we need to configure the role settings.
- On activation, require: select Microsoft Entra Conditional Access authentication context and select the Fido2 Authentication context we created before.
- Optional: Shorten the Activation maximum duration and or configure Require justification on activation for the auditing and Require approval to activate to use the Four-eyes principle.
- Click Update when finished to save the new settings

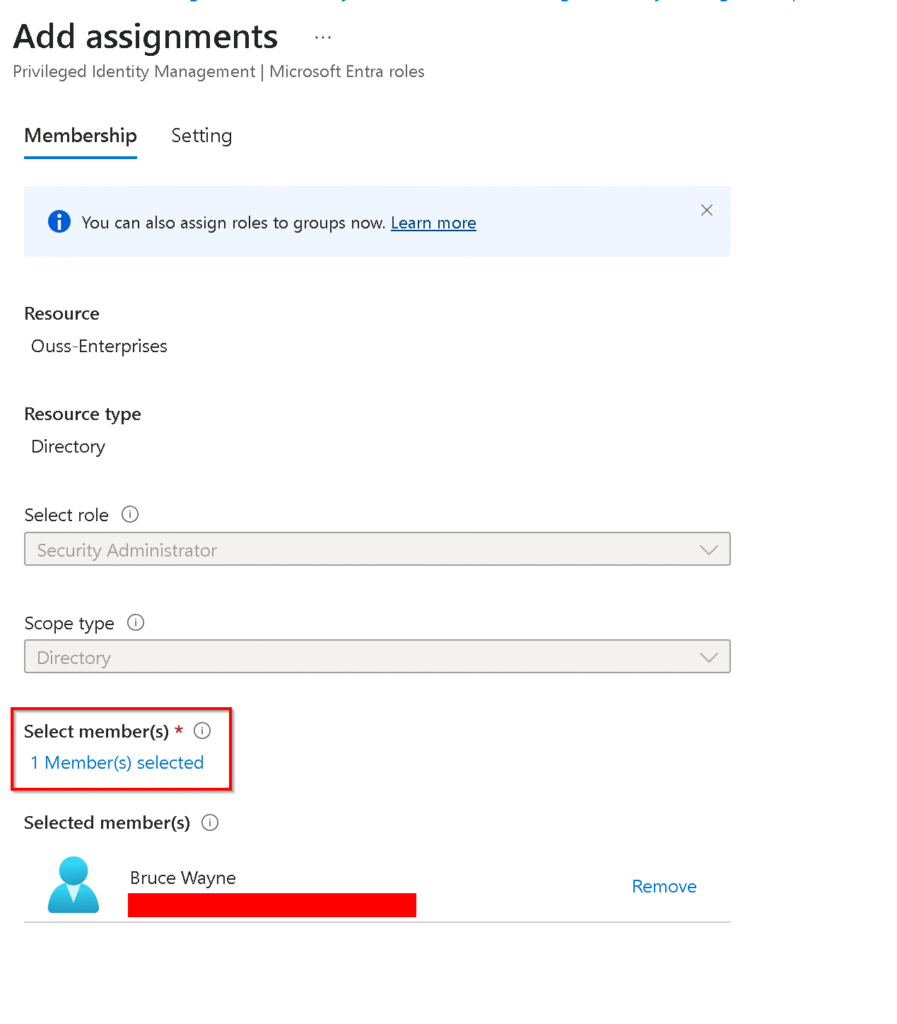
5. Add Assigments
To start using the role we need to assign it to an admin. Click Add assigments to add the role to an admin.

We now need to select either a user or a group that is eligible for this role.
The next step is selecting if the assigment for role has a end date or not. We will skip that step and Click on Assign to finish the assigment.

Now we can see that the user has been granted the PIM role of Security Administrator and we have the option to update this assigment or remove it if needed.

The user will be notified by email that he has a new role that can be activated. The user can click on the View or activate role to activate the Security Administrator role.

6.How the PIM role works in practice
- Role Activation:
When a user attempts to activate the Security Administrator role via PIM, they will be prompted to authenticate using a phishing-resistant MFA method, such as a FIDO2key. - Authentication with FIDO2Key:
The user inserts or taps their FIDO key and authenticates via a PIN or biometric option. - Role Assignment:
Once authenticated, the PIM system grants the user access to the Security Administrator role, subject to any additional approval requirements.

If this is the first time using the Fido2 key the user will need to pair the key like we previously showed here but we already did that step so this is what the admin sees:


and then the activation is finished successfully using the Fido2key requirement for the PIM activation.

Benefits of Requiring the FIDO2-Key for PIM Role Activation
- Phishing-Resistant Security: FIDO2 keys eliminate the risk of credential phishing during privileged operations.
- Granular Control: Conditional Access ensures that only users meeting specific criteria (e.g., FIDO2 key possession) can activate roles.
- Audit and Compliance: Entra PIM maintains logs of role activations, providing traceability for compliance purposes.
- User Convenience: Biometric or PIN-based authentication with FIDO keys provides a seamless user experience.
By combining PIM, Conditional Access, and FIDO2 keys, organizations can secure their most sensitive roles against unauthorized access while maintaining ease of use for administrators. Implementing this solution is a critical step toward a zero-trust security framework.
7. Bonus section part 1: Set up Temporary Access Pass (TAP) for onboarding
Why enable a Temporary Access Pass (TAP) first?
This step is crucial: you need MFA to register a FIDO2 key—but if the user doesn’t have any methods configured yet, you’ll be stuck.
To use a FIDO2 key, the user needs to satisfy MFA during the initial registration and that’s where TAP comes in. It acts as a time limited, strong authentication method that lets users onboard their FIDO2 key without needing a password or existing MFA. Think of it as a secure, one-time pass to get everything set up.
Here’s how to enable it:
1. Go to Microsoft Entra → Protection → Authentication methods → Temporary Access Pass

2. Enable the policy and assign it to the same user group as FIDO2

3. Issue a Temporary Access Pass to the user
You can do this under the user profile →
Authentication methods → Add Temporary Access Pass

4. Share the details with the user. After enabling it you will get the TAP details.

5. logon using the TAP details

This pass will allow the user to sign in securely to register their key, without needing any other MFA method.
8. Bonus section part 2: Testing the new sign in experience on a mobile device
You thought the fun was over? Not even close. Let’s really put this FIDO2 key to the test with some mobile action.
Yes, the key isn’t just for desktop sign-ins—it can also be used to log into Microsoft services like Microsoft Teams right from your mobile device. Whether you’re using the mobile browser or the Microsoft Teams app the FIDO2 key can do it all!
And now for the part I couldn’t wait to show you—this key has NFC. Yes, near field communication, the same magical tech that lets you pay for coffee with your phone. And we all know: everything is better with Bluetooth… (and NFC,) right? 😄

So how does this work on an iPhone, for example?
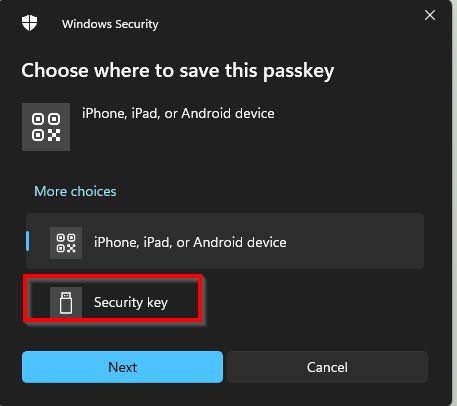
- Open Microsoft Teams login page.
- Enter your email and you will be prompted to use the Fido2-key..
- Choose the security key option and place the key at the NFC reader section on your phone and type in the pincode to login in.
- Boom—you’re in. No password. No codes. Just a tap-and-go experience (You can also use this method to satisfy MFA re-authentication if needed.)


This works for other apps that support modern auth too, not just Teams. The important part is: as long as the app or site supports WebAuthn (which Microsoft services do), you’re good to go.
This little key is surprisingly versatile and kind of fun to use.
9. Final thoughts
We’ve now completed the trilogy (Don’t we all love good trilogies? The Dark Knight we’re looking at you 🦇🦇🦇).
So to sum it up:
✅ FIDO2 sign-in enabled
✅ Passwordless login via Windows Hello for Business
✅ Secure, phishing-resistant privileged access using FIDO2 + PIM
This is the kind of security posture that’s not only modern and compliant—but also convenient for your users and sustainable for IT.
Ready to ditch passwords for good? You’re already well on your way.
Stay tuned for more on securing your digital workplace—and as always….until next time on Ouss in the Cloud.